

How to Froth Milk for Moka Pot Coffee: 2026 Guide
Table of Contents
- Why Frothing Milk for Moka Pot Coffee Works
- Temperature Control for Optimal Foam
- The French Press Method for Frothing
- Using a Manual Whisk for Milk Texture
- Achieving Microfoam Consistency Without a Steam Wand
- The Best Milk Frother for Home Use
- The Right Moka Pot Coffee to Milk Ratio
- How to Make a Latte with a Moka Pot
- Advanced Latte Art Techniques and Cleaning
- Conclusion
- Frequently Asked Questions
Last Updated: September 13, 2026
Why Frothing Milk for Moka Pot Coffee Works
Frothing milk for moka pot coffee works because moka pot coffee already has the body and intensity of espresso-style brew, and steamed milk softens that intensity without washing it out. A stovetop brew pushes water through finely ground coffee at pressure, producing a concentrated cup with real crema and viscosity. Milk frothed to the right texture adds sweetness and a silky mouthfeel that balances the bitterness.
The catch most guides skip: you do not need a steam wand to get there. The equipment that matters is a way to agitate milk while heating it, plus control over temperature.
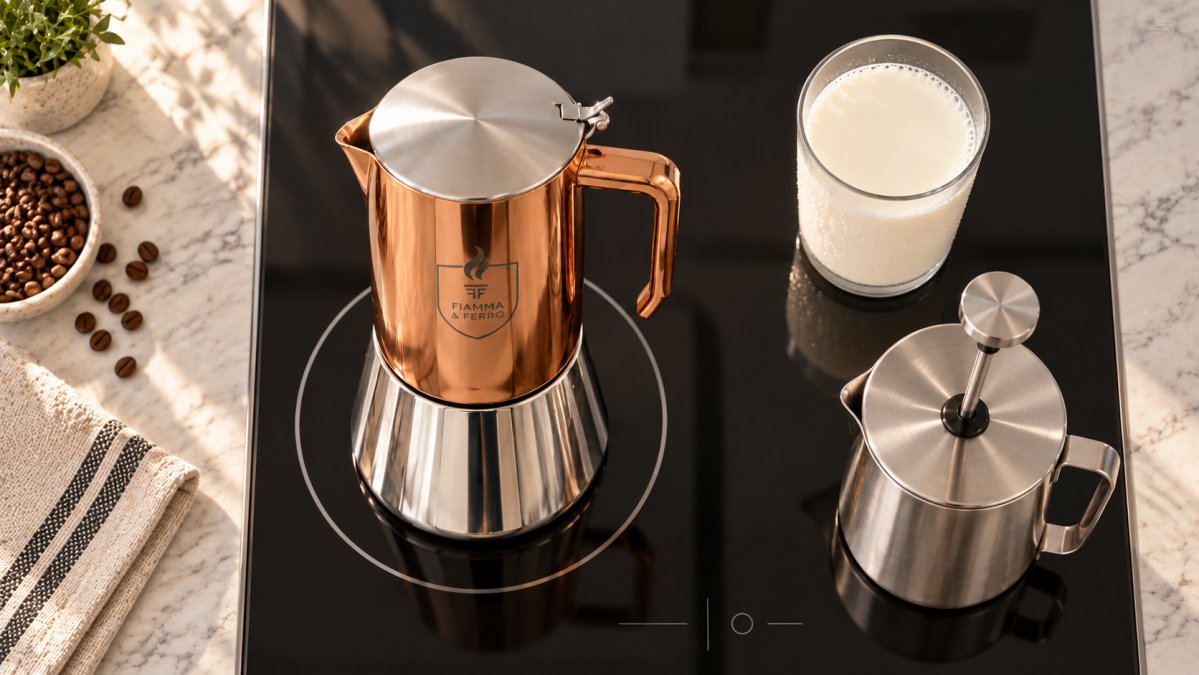
Fiamma & Ferro builds stovetop espresso makers and manual grinders. A moka pot that brews a rich, full-bodied shot deserves better than a splash of cold milk.

Temperature Control for Optimal Foam
The target temperature range for frothed milk is 140°F to 155°F (60°C to 68°C) (Heat Stability Assessment of Milk: A Review of Traditional and Innovative Methods). Above roughly 160°F, the whey proteins in milk begin to denature and unfold, which is what produces the flat, faintly cooked flavor of scalded milk and foam that collapses within a minute of pouring (pubmed.ncbi.nlm.nih.gov).
Heat source matters as much as the final number. A stovetop gives you no thermostat, so pull the pot off the burner the moment the milk feels hot to the touch and the pitcher is uncomfortable to hold for more than a second. If you are frothing directly in a metal vessel on the same burner you used for the moka pot, residual heat in the metal keeps cooking the milk even after the flame is off, move the vessel to a cool surface, not just off the flame.
A few practical rules:
- Start with cold milk straight from the refrigerator; cold milk gives you a longer window before it overheats
- Never boil milk. The boiling point is well past the point where milk proteins break down, and a rolling boil in a metal vessel on a stovetop is a scald risk if it spits
- If you overshoot, chill the pitcher in an ice bath for 30 seconds before pouring
- Use a thermometer if you can. A $10 instant-read or clip-on dial thermometer removes the guesswork that a hand test cannot
Why the Boiler Is Not a Milk Vessel
A recurring question is whether you can skip the pitcher and put milk directly in the moka pot base, either alone or mixed with water. The short answer is no, and the reasons are mechanical rather than stylistic.
A moka pot's boiler is a sealed pressure vessel. Water in the base is heated until it builds enough pressure to push up through the coffee bed and out the chimney. Milk in the base changes that system in three ways:
- Protein scorching. Milk proteins and sugars scorch against the hot metal floor of the boiler long before the water reaches brewing temperature, leaving a baked-on film that is difficult to remove and flavors every subsequent brew.
- Clogging. Milk solids can migrate into the funnel stem and the gasket seat, narrowing the path the brew needs to travel. A partially clogged moka pot builds pressure unevenly and can sputter or spray.
- Scald and pressure risk. A sealed vessel containing a foaming, expanding liquid is not the same as one containing water. The pressure relief valve on a moka pot is designed around water, not milk, and the consequences of a blocked valve are not something to test in a home kitchen.
The practical takeaway: brew the coffee in the base with water as designed, then froth the milk separately. If you want a milk-forward drink, add the frothed milk to the cup after brewing, never to the boiler before it.
The French Press Method for Frothing
The French press, or cafetière, is the most reliable manual frother in a home kitchen. Pour cold milk into the carafe to about one-third full, then plunge the filter up and down rapidly for 20 to 30 seconds. The mesh screen forces air into the milk and creates a dense, aerated layer.
What most guides miss is the resting step. After plunging, let the milk sit for 30 seconds so larger bubbles rise and pop, leaving finer foam behind. Then warm the carafe gently in a water bath, or microwave the milk for 15 to 20 seconds before plunging.
Two details decide the outcome:
- Keep the plunger submerged. Lifting it above the milk surface introduces big, unstable bubbles
- Use a carafe with a tight-fitting mesh; loose screens let milk escape past the filter and reduce aeration
Using a Manual Whisk for Milk Texture
A manual whisk works, but it demands a specific whisking motion: fast, shallow, side-to-side strokes that keep the whisk head just under the surface. You are not stirring the milk, you are folding air into it.
Warm the milk first to roughly 140°F, then whisk for 45 to 90 seconds. The effort is real, and the payoff is modest compared with a French press or a purpose-built frother. This method suits small volumes, about 2 to 3 ounces, and it works best with whole milk because the fat content stabilizes the bubbles you create.
A common mistake is whisking cold milk and then heating it. Heat after aeration destroys much of the structure you just built. Warm first, aerate second, pour immediately.
Achieving Microfoam Consistency Without a Steam Wand
Microfoam is the fine, glossy, paint-like milk texture that sits on top of a latte without visible bubbles. Without a steam wand, you produce it through manual agitation followed by a settling period.
Consistency comes from three variables: fat content, temperature, and how long you let the foam rest. Whole milk produces the most stable microfoam because milk proteins and fat work together to hold air (pubmed.ncbi.nlm.nih.gov). Lower-fat milk froths faster but collapses sooner.
For a more even texture, tap the pitcher on the counter a few times after frothing, then swirl it in a circular motion for 5 to 10 seconds. This breaks down larger bubbles and integrates the foam into the liquid milk, which is what gives you that pourable, glossy consistency rather than a dry cap of stiff foam.
The Best Milk Frother for Home Use
The best milk frother for home use depends on how much control you want. A French press gives you the most tactile control and doubles as a coffee brewer. A handheld battery frother is the fastest option for a single cup. A stovetop or electric milk steamer is the closest thing to barista technique without a steam wand.
Method |
Time |
Best For |
Control Level |
|---|---|---|---|
French press |
60-90 sec |
Daily ritual, small batches |
High |
Manual whisk |
45-90 sec |
One small cup |
Medium |
Handheld frother |
15-30 sec |
Speed, single servings |
Low |
Electric steamer |
60-120 sec |
Hands-off, consistent results |
Medium |
If you want the full ritual in one purchase, our Fiamma & Ferro Espresso Ritual Bundle pairs the Titanium+ manual grinder with the 12-cup stainless steel stovetop espresso maker.

The Right Moka Pot Coffee to Milk Ratio
The moka pot coffee to milk ratio for a latte is roughly 1 part coffee to 3 parts milk by volume. A standard moka pot yields about 2 ounces of concentrated brew per serving, so plan on 5 to 6 ounces of frothed milk for a balanced 8-ounce drink.
Adjust from there:
- Stronger: 1:2 ratio, for a cortado-style drink
- Standard latte: 1:3, the most common starting point
- Milk-forward: 1:4, closer to a cappuccino in milk volume but with softer foam
Coffee-to-milk ratio is the variable that changes the drink most, more than grind size or froth technique. Pull the ratio wrong and no amount of latte art will fix the flavor balance.
How to Make a Latte with a Moka Pot
Here is the step-by-step process for a moka pot latte at home.
- Fill the moka pot base with cold water up to just below the pressure valve. Never pack the basket or tamp the grounds.
- Add finely ground coffee to the basket, level it off without pressing. A medium-fine grind works best; too fine and you risk pressure buildup.
- Assemble the pot and place it on the heat source. Keep the lid open for the first minute so you can watch the extraction.
- As soon as the coffee begins to sputter and lighten in color, remove the pot from heat. Over-extraction turns the brew bitter.
- Warm 5 to 6 ounces of whole milk to 140°F to 155°F.
- Froth the milk using your chosen method, then let it settle for 30 seconds and swirl.
- Pour the moka pot coffee into your cup first, then pour the frothed milk slowly down the side of the cup.
- Finish with a slow, centered pour to bring the foam to the surface.
Advanced Latte Art Techniques and Cleaning
Latte art is a pour technique, not a milk technique, but the two are linked. You cannot pour a clean heart with foam that is too stiff. The milk needs to be glossy and pourable, with microfoam integrated into the liquid rather than sitting on top of it.
Start with the basics:
- The heart: Pour from height to set the base, then lower the pitcher close to the surface and pour steadily in one spot. Lift straight up at the end to draw the point
- The monk's head: Pour a single round blob close to the surface and stop. It teaches you to control pour height
- The tulip: Pour three or four separate blobs, each one pushing the previous one forward
Milk Fat and Foam Stability
Most guides treat milk as a single ingredient. It is not. The fat and protein content of what you pour determines how long your art holds its shape.
- Whole milk (roughly 3.25% milkfat): The most forgiving for latte art. Fat globules and proteins work together to stabilize the air you introduce, giving you a longer window to pour before the foam separates.
- 2% and skim: Skim froths faster and produces a stiffer, drier foam that is easier to over-aerate. It collapses sooner and pours less cleanly, which makes fine lines harder to draw.
- Oat milk: Barista-style oat milks are formulated with added oils and stabilizers specifically to mimic whole milk's foam behavior. Standard oat milk separates quickly and pours unevenly.
- Almond milk: The lowest protein content of the common alternatives, so it holds air poorly. Expect a thinner, faster-collapsing foam and simpler pours.
The practical rule: if you want to practice latte art, start with whole milk. Once your pour is consistent, switch milks one at a time so you can feel how each one changes the texture.
Cleaning: The Part Nobody Covers
Milk residue is the single biggest maintenance problem in a home coffee setup, and it is worse when you are brewing milk-based drinks in metal equipment. Milk proteins and fats bond to stainless steel and to silicone gaskets, and once they bake on they turn rancid and flavor every subsequent cup.
A workable routine:
- Frothing pitcher or French press carafe: Rinse with cold water immediately after use, then wash with warm soapy water and dry fully. Cold water first matters, hot water first can set milk proteins onto the metal and leave a film that soap struggles to remove.
- Handheld frother whisk: Run the whisk under cold water immediately, then warm soapy water. Milk dries in the coil and is hard to remove once it has set.
- Moka pot: Disassemble it completely after every milk-involved session. Check the silicone gasket and the underside of the funnel for milk or coffee buildup, since a degraded gasket affects both seal quality and flavor. Replace the gasket on the schedule the manufacturer recommends, typically every few months with regular use, and keep a spare on hand.
- Steam wand (if you have one): Purge and wipe immediately after every use. Dried milk on a wand is the hardest residue to remove in the entire setup.
Conclusion
The hardest part of frothing milk for moka pot coffee is not the technique. It is resisting the urge to change five things at once when the first cup falls short.
Pick one method from this guide, whether that is a French press, a manual whisk, or a dedicated frother, and repeat it until the texture is predictable. Then adjust the coffee-to-milk ratio, and only then work on pour technique.
If you want equipment built for this exact ritual, our Linea Suprema Stainless Steel Stovetop Espresso Maker uses 304 stainless steel with no aluminum and no plastic, works on induction cooktops, and includes OEM replacement gaskets. Pair it with the Titanium+ Precision Manual Grinder for consistent, finely ground coffee every morning. Get started with Fiamma & Ferro and brew a cleaner, richer cup with milk that holds its shape.
Frequently Asked Questions
Can you make a latte with a moka pot?
Yes. A moka pot brews concentrated coffee that works well as a latte base. Brew your moka pot coffee, froth milk separately using a French press or manual frother, then combine them. Use a ratio of roughly 1 part coffee to 3 parts milk for a balanced latte. The result is a rich, creamy drink without needing an espresso machine.
What is the best way to froth milk at home without a machine?
A French press is the most effective manual tool. Pour warm milk into the carafe, insert the plunger, and pump it rapidly for 30 to 45 seconds. The mesh filter aerates the milk and builds microfoam. A handheld whisk works too but takes longer and produces slightly larger bubbles. Both methods cost far less than an electric frother.
What type of milk is best for frothing?
Whole milk produces the most stable microfoam because its fat content supports bubble structure. Milk proteins, particularly casein, form the film around air bubbles that gives foam its viscosity. Skim milk froths but creates drier, less stable foam. Plant-based milks vary widely; oat and soy often perform best because of added stabilizers.
How do you get microfoam without a steam wand?
Manual agitation is key. Heat milk to between 140°F and 155°F, then use a French press or manual frother to introduce air in short bursts. Once the volume increases by about a third, stop aeration and continue plunging to break large bubbles into fine ones. The goal is glossy, paint-like microfoam with no visible bubbles on the surface.