

Best Stovetop Espresso Maker for Induction in 2026
Table of Contents
- Why Induction Cooktops Demand a Different Moka Pot
- How We Tested and What to Look For in a Stainless Steel Moka Pot
- Stainless Steel vs. Aluminum Moka Pots: Which Works on Induction?
- Capacity and Cup Size Guide for Induction Moka Pots
- How to Use a Moka Pot on Induction Without Damaging Your Cooktop
- Best Grind Size for Stovetop Espresso and Why It Matters
- How to Clean a Moka Pot So It Lasts for Years
- Long-Term Durability, Gasket Replacement, and Water Chemistry
- Conclusion
- Frequently Asked Questions
Last Updated: September 13, 2026
Why Induction Cooktops Demand a Different Moka Pot
Aluminum moka pots, the classic stovetop design, simply will not heat on an induction burner. Induction cooktops generate a magnetic field that only reacts to ferrous metals, so a pot must have a magnetic base to work at all (energy.gov). That single physical fact eliminates most traditional moka pots before you even start shopping.
At fiammaferro.com, we build our brewers around this constraint rather than treating it as an afterthought. If you own an induction range and want the rich, espresso-like strength of stovetop coffee, you need a best stovetop espresso maker for induction built from magnetic stainless steel. The good news: a properly made stainless steel moka pot performs as well as aluminum on flavor and often better on durability.

Below, we break down what actually matters when choosing one, from base design to grind size, so you can buy once and brew well for years.
How We Tested and What to Look For in a Stainless Steel Moka Pot
We evaluate induction moka pots on base construction, valve design, capacity accuracy, and how the brewer holds up after repeated heating cycles. A pot that heats fast but warps or scorches the coffee fails the test regardless of price.
Induction Compatibility and Base Design
The base is the whole ballgame. A stovetop espresso maker for induction needs a flat, ferromagnetic bottom, typically 18/10 or 304 stainless steel with a magnetic core. Hold a magnet to the base before buying; if it does not stick, the pot will not heat. A thicker base spreads heat more evenly and resists warping, which matters because induction delivers energy fast and unevenly compared to gas.
Pressure Valve and Safety Features
Every safe moka pot has a safety release valve in the lower chamber. This valve vents excess steam pressure before it can build to a dangerous level. Look for a valve that sits cleanly in the body, not one that rattles or feels loose. A well-machined valve is the difference between a controlled brew and a mess on your cooktop.
Stainless Steel vs. Aluminum Moka Pots: Which Works on Induction?
Stainless steel is the only practical choice for induction cooktops, because aluminum is non-magnetic and will not heat on an induction burner. This is not a matter of preference; it is basic physics.
Beyond compatibility, the two materials behave differently in daily use. Stainless steel resists oxidization and does not react with acidic coffee oils, so it avoids the metallic aftertaste some drinkers notice with bare aluminum. It also holds up to dishwasher cycles and heavy scrubbing. Aluminum heats quickly and costs less, but it dents, discolors, and cannot be used on induction at all.
Factor |
Stainless Steel |
Aluminum |
|---|---|---|
Induction compatible |
Yes |
No |
Corrosion resistance |
High |
Low |
Metallic aftertaste risk |
Low |
Higher |
Dishwasher safe |
Often yes |
Usually no |
Durability |
High |
Moderate |
For induction owners, the comparison ends early. A quality stainless steel moka pot is the only option that brews and lasts.
Capacity and Cup Size Guide for Induction Moka Pots
Moka pot capacity is measured in cups, but a "cup" here is a small espresso-style serving, not a standard mug. A 6-cup pot yields roughly 6 small servings of concentrated coffee, enough for two people drinking doubles.
Match capacity to your household, not your enthusiasm. Oversized pots waste coffee and are harder to brew evenly, because a large water reservoir takes longer to reach brewing temperature and the grounds can scorch before the water rises.
- 2-cup: one solo drinker, a single daily shot
- 4-cup: one or two people, one round each
- 6-cup: two to three people, or one person who drinks doubles
- 12-cup: entertaining, or a household of heavy drinkers
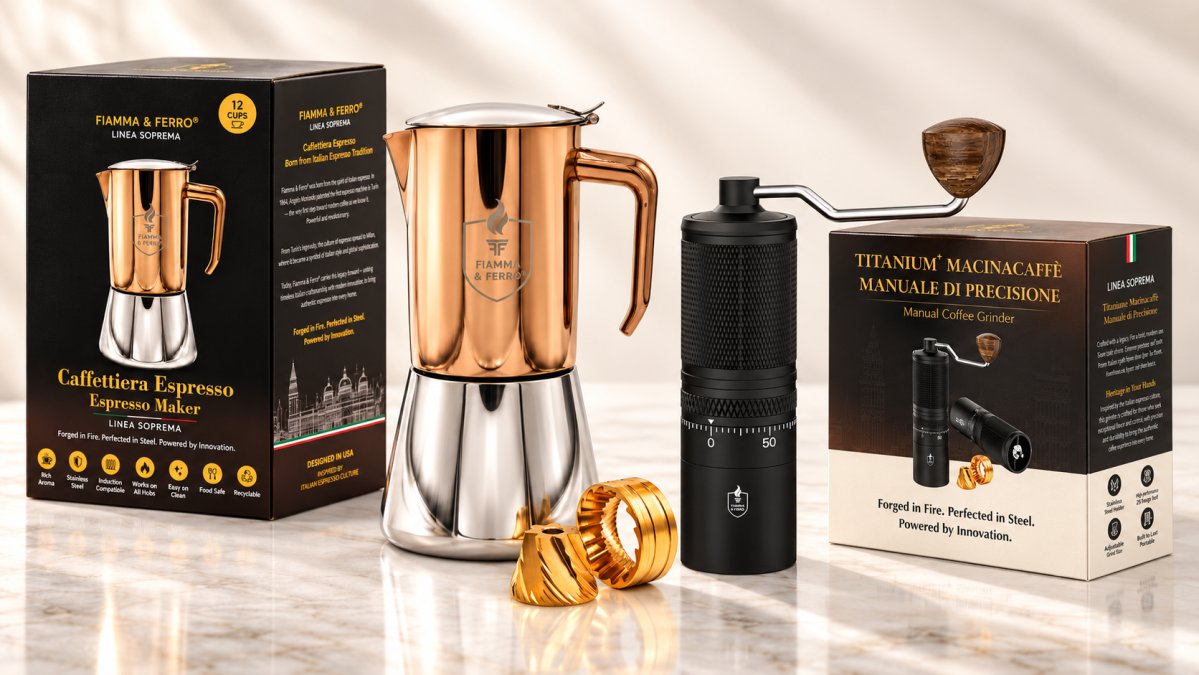
Our flagship Linea Suprema is a 12-cup, 20 oz (600 ml) brewer built from 304 stainless steel with no aluminum, no plastic, and no paint. It suits households that brew for several people at once.
How to Use a Moka Pot on Induction Without Damaging Your Cooktop
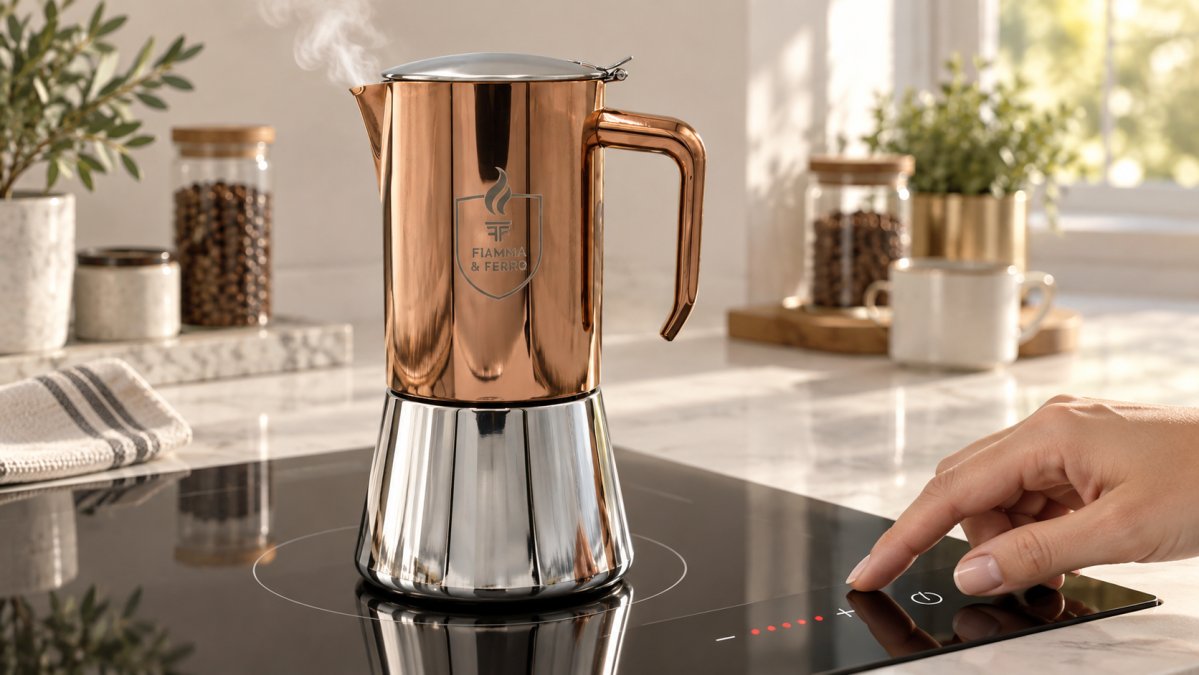
The biggest mistake induction owners make is cranking the burner to maximum. Induction transfers energy through a magnetic field directly into the pot base rather than through a flame or a glowing coil, so the base reaches brewing temperature in a fraction of the time it would on gas. A moka pot run on high will scorch the grounds, drive the water up before the coffee is ready, and can leave heat marks or discoloration on the cooktop surface.
Why Induction Changes the Brew
On gas, the flame wraps the lower chamber and heat climbs the walls gradually. On induction, the magnetic field excites the ferromagnetic base itself, so heat concentrates at the bottom and spreads upward through the water. That concentrated heat is efficient, but it also means the window between "not yet brewing" and "boiling hard" is narrow. Medium-low is the working setting on most induction ranges; the exact dial position varies by model, so the first brew on a new cooktop is a calibration run.
Step-by-Step Brew Sequence
- Fill the lower chamber with cold water to just below the safety valve. Leave a small air gap so steam can form.
- Add medium-fine ground coffee to the filter basket, level it with your finger, and do not tamp. Tamping restricts flow and can stall the brew.
- Screw the upper and lower chambers together firmly. A loose seal lets steam escape sideways instead of pushing water up through the grounds.
- Set the burner to medium-low and place the pot centered on the ring. Off-center placement heats one side of the base harder than the other.
- Listen for the first gurgle and watch the flow. Remove the pot the moment the stream turns pale yellow and begins to sputter.
Never let the pot boil dry, and never leave it unattended. The whole brew takes only a few minutes on induction, so stay nearby.
Protecting the Cooktop Surface
Induction glass-ceramic surfaces are tough but not scratch-proof. Two habits prevent most damage:
- Lift the pot to move it; never slide it across the surface. Sliding traps grit between the base and the glass and leaves fine scratches.
- Check the base for burrs or rough edges before the first use. A poorly finished base can mar the cooktop on the very first brew.
If the cooktop manufacturer specifies a minimum pan diameter, respect it. A pot smaller than the marked ring concentrates heat in a narrow zone and can stress the glass.
Troubleshooting Common Induction Problems
- Pot will not heat at all: the base is not ferromagnetic. Test with a magnet; if it does not stick, the pot is not induction-compatible regardless of what the label says.
- Coffee spurts out fast and tastes bitter: the burner is too high. Drop to low and let the pot come up to temperature slowly.
- Brew stalls and nothing comes out: the grind is too fine or the pot was tamped. Loosen the grind one step and refill.
- Cooktop shuts off mid-brew: some induction ranges have a small-pan detection threshold. If the pot base is narrower than the smallest recognized size, the burner may cycle off. Check your range manual for the minimum diameter.
Best Grind Size for Stovetop Espresso and Why It Matters
The best grind size for stovetop espresso sits between drip and true espresso: a medium-fine grind, finer than you would use in a drip machine but coarser than espresso-machine powder. Too fine and the pressure builds unevenly or the basket clogs; too coarse and water rushes through without extracting flavor.
That is the standard answer, and it is where most guides stop. It is also incomplete for induction owners, because the material of your pot changes how heat reaches the coffee, and that changes what grind actually works.
Why Stainless Steel Brews Differently Than Aluminum
Aluminum conducts heat roughly several times faster than stainless steel (nist.gov). On a gas burner, that difference is partly masked by the flame's gradual, even delivery. On induction, the base is heated directly and aggressively, and the pot's ability to spread that heat across the coffee bed becomes the limiting factor.
Stainless steel spreads heat more slowly and more evenly than aluminum. The practical result: the water in a stainless steel moka pot tends to rise at a steadier, slightly slower rate. That slower rise gives the grounds more contact time with hot water, which means a grind that works in an aluminum pot can over-extract and taste harsh in a stainless steel one.
Adjusting Grind for a Stainless Steel Induction Pot
A common pattern among experienced moka pot users is to go one step coarser than they would in an aluminum pot on gas. The goal is to keep the brew time in the same window despite the different heat profile. If your cup tastes bitter, ashy, or dry, the grind is likely too fine for the slower stainless steel rise. If it tastes sour, thin, or watery, the grind is too coarse and the water is passing through before it extracts.
Grind consistency matters as much as grind size. A burr grinder produces uniform particles, while a blade grinder leaves a mix of dust and chunks that brews unevenly. Our Titanium+ Precision Manual Coffee Grinder uses titanium-coated burrs and precise adjustment to keep the grind consistent cup after cup, with a 10-year burr performance warranty.
Dose and Leveling
Moka pots are not espresso machines, so dose is set by the basket, not by a scale. Fill the basket level and do not tamp. Overfilling compresses the bed and restricts flow; underfilling leaves channels where water escapes without contacting coffee. A level, untamped bed is the target in both aluminum and stainless steel pots.
Water Chemistry and Its Effect on Extraction
Water chemistry quietly shapes flavor and scale, and it interacts with grind size. Hard water leaves mineral deposits in the lower chamber and on the valve, which can restrict flow over time and make a fine grind stall. If your tap water is very hard, brewing with filtered water reduces scale and keeps the safety valve clear. Soft or filtered water also extracts more predictably, so the grind adjustments you make actually show up in the cup instead of being masked by mineral interference.
Grind size, dose, and water quality together shape extraction more than most buyers expect. Get the grind right for your pot's material, and the rest of the brew falls into place.
If you want the full setup in one purchase, the Espresso Ritual Bundle pairs that grinder with the 12-cup stainless steel moka pot for a complete grind-and-brew system.
How to Clean a Moka Pot So It Lasts for Years
Rinse the moka pot with warm water and a soft brush after every use, and skip soap for the upper and lower chambers. Coffee oils build a protective seasoning that soap strips away, and harsh detergents can leave residue that flavors the next brew.
Once a week, disassemble the pot completely: unscrew the chambers, remove the gasket and filter plate, and rinse each part. Check the gasket for cracks or hardening. A worn gasket seal is the most common cause of leaks and weak brews, and it is the cheapest part to replace.
- Hand wash the body to protect the finish
- Soak stubborn buildup in warm water, never abrasive pads
- Dry all parts fully before reassembling to prevent mineral spotting
- Replace the gasket when it stiffens, typically every 6 to 12 months
Stainless steel tolerates dishwasher cycles better than aluminum, but hand washing still extends the life of the finish and the gasket.
Long-Term Durability, Gasket Replacement, and Water Chemistry
A stainless steel moka pot can last for decades if you maintain the gasket and treat the base well. The gasket, not the metal, is the wear item. Silicone gaskets hold up longer than rubber and resist heat better, so replacing a tired rubber seal with silicone is a worthwhile upgrade. fiammaferro.com stocks OEM replacement gaskets so you are not hunting for an off-brand part that fits poorly.
Water chemistry quietly affects flavor and scale. Hard water leaves mineral deposits in the lower chamber and on the valve, which can restrict flow over time. If your tap water is very hard, brewing with filtered water reduces scale and keeps the safety valve clear. Grind size and water quality together shape extraction more than most buyers expect.
Environmental Impact of Stainless Steel vs. Aluminum
Stainless steel is highly recyclable and, because it resists corrosion and denting, it tends to stay in service far longer than aluminum. That longer lifespan means fewer pots replaced over time, which lowers the material footprint of your daily ritual. Aluminum is also recyclable, but its shorter working life and incompatibility with induction push most owners to replace rather than repair.
Conclusion
Choosing a stovetop espresso maker for induction comes down to one hard requirement: a magnetic stainless steel base, backed by a working safety valve and a gasket you can replace. Get those right and the rest is technique.
At fiammaferro.com, we build induction-ready brewers for people who care about material purity and a lasting daily ritual. Our Linea Suprema moka pot uses 304 stainless steel with no aluminum, no plastic, and no paint, and it ships with a protective canvas bag, full-color brew and care guides, and access to OEM replacement parts. Pair it with our Titanium+ Precision Manual Coffee Grinder, or start with the Espresso Ritual Bundle for the complete grind-and-brew setup.
Get started with fiammaferro.com and brew richer, cleaner stovetop coffee on your induction cooktop for years to come.
Frequently Asked Questions
How do I know if my moka pot works on an induction stove?
Check if a magnet sticks firmly to the base. Induction cooktops require a magnetic bottom to generate heat. Stainless steel moka pots with a magnetic base, like 18/10 stainless steel models With 430 Stainless base, work on induction. Aluminum pots do not work unless they have a special induction plate. If the magnet slides off, the pot won't heat on an induction burner.
Why is stainless steel better than aluminum for induction cooktops?
Stainless steel is magnetic, so it responds directly to induction burners without an adapter plate. Aluminum is not magnetic and won't heat on induction. Stainless steel also resists corrosion, doesn't react with acidic coffee oils, and avoids the metallic aftertaste some users notice with aluminum. It's more durable and dishwasher-safe, though hand washing preserves the finish longer.
What is the best grind size for stovetop espresso?
Use a medium-fine grind, similar to table salt. Too fine and the pressure builds too high, causing bitter, over-extracted coffee. Too coarse and water flows through too fast, leaving weak, sour coffee. A consistent grind from a burr grinder makes a noticeable difference. Adjust slightly coarser for larger moka pots and finer for smaller ones.
How do you clean a stainless steel stovetop espresso maker?
Disassemble the pot and rinse all parts with warm water. Use a soft brush to remove coffee grounds from the filter basket and gasket. Avoid abrasive sponges or harsh detergents that can scratch the stainless steel. Hand wash and dry immediately to prevent water spots. Never put aluminum parts in the dishwasher; stainless steel is dishwasher safe but hand washing extends the life of the gasket and finish.