

Can You Make Good Espresso With a Stovetop? (2026 Guide)
Table of Contents
- Why Stovetop Espresso Works (And Where It Falls Short)
- The Right Moka Pot Grind Size for Balanced Extraction
- How to Stop Moka Pot Coffee From Tasting Bitter
- Best Coffee Beans for Moka Pot Brewing
- Water Chemistry: The Variable Most Brewers Ignore
- Visual Extraction Cues and Troubleshooting Sputtering
- Basket Density and Tamping Myths
- Cleaning, Maintenance, and Replacement Parts
- Frequently Asked Questions
Last Updated: September 26, 2026
Why Stovetop Espresso Works (And Where It Falls Short)
Can you make good espresso with a stovetop? Yes, provided you accept what a moka pot actually is: a pressure brewer that produces a rich, concentrated coffee rather than a true 9-bar espresso shot. This guide from fiammaferro.com covers the grind, heat, and water variables that separate a syrupy, sweet cup from a bitter, sputtering one.
The moka pot generates roughly 1 to 2 bar of pressure as steam builds in the lower chamber. That is far below the 9 bar a pump machine uses. What you get instead is a dense, full-bodied brew with real depth.
The catch is control. A stovetop has no thermostat, no pressure gauge, and no timer. Every variable runs through your hands.
Below, we'll show you exactly how to manage those variables and why most bitterness complaints trace back to heat, not beans.
The Right Moka Pot Grind Size for Balanced Extraction
Moka pot grind size should sit in the medium-fine range, finer than drip but coarser than true espresso. This single adjustment fixes more bitterness problems than any other change.
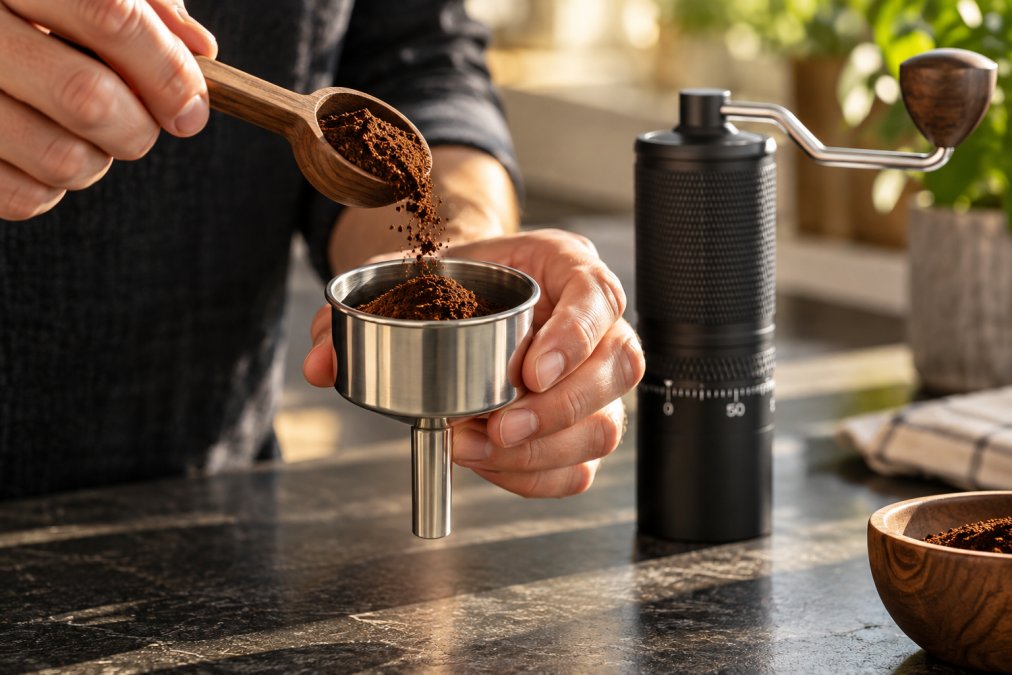
Close-up of hands filling a moka pot filter basket with freshly ground coffee, a manual grinder visible in soft focus behind it on a dark kitchen counter with warm morning light
Medium-Fine: The Target Range
Think of the texture of fine table salt. The grounds should clump slightly when pinched but not pack into a solid brick.
A common mistake is treating the moka pot like an espresso machine. It isn't one. The pressure difference changes what the coffee bed can handle.
Grind too coarse and water races through the bed. The result tastes weak, sour, and thin. Grind too fine and the bed blocks flow entirely.
Why Espresso-Fine Grinds Choke a Moka Pot
Espresso-fine powder creates two problems at once. First, it clogs the filter basket, so pressure builds in the wrong place and the pot sputters. Second, the water sits against overheated grounds for too long, pulling out harsh, bitter compounds.
A precision grinder makes this range repeatable. The Fiamma & Ferro Titanium+ Manual Grinder offers 180 grind settings, so you can step between moka and espresso without guessing. Its titanium-coated burrs are rated for 500kg+ of beans.

Fiamma & Ferro Titanium+ Professional-Grade Manual Coffee Grinder — Titanium Burr | 180 Grind Settings
Grind Setting |
Result in a Moka Pot |
Fix |
|---|---|---|
Too coarse |
Weak, sour, fast flow |
Step finer |
Medium-fine |
Balanced, sweet, steady flow |
Keep it |
Espresso-fine |
Choked basket, sputtering |
Step coarser |
How to Stop Moka Pot Coffee From Tasting Bitter
Bitterness in moka pot coffee almost always comes from heat, not from the beans. Overheated water and scorched grounds extract harsh compounds that no roast level can hide.
Water Temperature and Preheated Water
Start with preheated water in the lower chamber. Cold water means the grounds sit in the basket while the pot slowly climbs to temperature, and that long, gentle heat pulls out bitterness before brewing even begins.
Use hot water from a kettle, not boiling. Fill to just below the safety valve.
Heat Management and Avoiding Scorched Grounds
Keep the flame low once the pot is on the burner. High heat does not speed up good extraction, it just scorches the coffee bed and pushes steam through too fast.
Watch for the first sign of coffee emerging, then drop the heat further. A slow, steady flow is the goal. A violent rush means the temperature ran away from you.
Best Coffee Beans for Moka Pot Brewing
Medium and medium-dark roasts work best for moka pot brewing because they hold up to the brew's intensity without turning harsh. Very dark roasts tend to taste ashy here, while very light roasts can read sour.
Look for beans with tasting notes that match what you want in the cup. Chocolate, nut, and caramel notes tend to shine. Bright, fruity light roasts often get lost.
Freshness matters more than origin. Coffee loses aroma within minutes of grinding, so whole beans ground right before brewing give you the clearest flavor.
A Specialty Coffee Association guide to freshness notes that grind timing is one of the most controllable variables in home brewing.
For a complete setup, the Fiamma & Ferro Espresso Ritual Bundle pairs the Titanium+ grinder with the Linea Suprema moka pot at $324.98.


Water Chemistry: The Variable Most Brewers Ignore
Water chemistry is the variable almost no stovetop guide addresses, and it is often the reason a brewer can change grind, heat, and beans without fixing a bitter or flat cup. Coffee is roughly 98% water by mass, so the minerals dissolved in that water do more to shape extraction than most brewers realize.
What the Minerals Actually Do
Two minerals drive most of the effect:
- Magnesium binds readily to the acidic and aromatic compounds in roasted coffee and pulls them into solution. Too little magnesium and the cup tastes flat and hollow, no matter how good the beans are.
- Calcium supports extraction of heavier, sweeter compounds but also binds to carbonate. When calcium carbonate is high, it buffers the acids that give coffee its brightness, and the cup reads dull and chalky.
- Bicarbonate (alkalinity) is the buffering capacity of the water. High alkalinity mutes acidity and can push bitterness forward because the brew's natural acid balance is flattened.
A common pattern in home brewing is water that is hard (high calcium and magnesium) but also high in alkalinity. That combination scales the pot and flattens flavor at the same time.
Why Distilled and Very Soft Water Fail
Distilled water and zero-mineral reverse-osmosis water extract poorly. With no magnesium or calcium to bind coffee compounds, the brew comes out thin, sour, and underdeveloped. Brewers sometimes describe it as "empty." Do not brew moka pot coffee with distilled water.
At the other extreme, very hard water leaves scale on the lower chamber, the funnel, and the gasket seat. Scale insulates the metal, slows heat transfer, and eventually warps the seal. It also adds a chalky, drying sensation to the cup.
A Practical Target Range
The Specialty Coffee Association publishes a widely cited water standard for brewed coffee that most practitioners treat as a reasonable target:
- Total dissolved solids (TDS): roughly 75-250 ppm
- Alkalinity: roughly 40 ppm as CaCO₃
- pH: roughly 6.5-7.5
- No chlorine or chloramine
You do not need a lab. A $15-$30 TDS pen and a strip or drop test for alkalinity will tell you whether your tap water is in range. If TDS reads above 250 ppm, dilution with distilled water is the cheapest fix. If it reads below 75 ppm, a mineral packet or a pinch of baking soda (about 0.1 g per liter) restores enough buffer to extract properly.
The Moka Pot-Specific Angle
Moka pots concentrate the brew more than drip, so off-flavors from water are amplified. A water profile that tastes fine in a drip brewer can taste harsh or metallic in a moka pot because the same minerals are now interacting with a much denser extract. If your coffee tastes dull no matter what you change, test your water before you blame the beans, and before you buy a new grinder.
Visual Extraction Cues and Troubleshooting Sputtering
Sputtering is the clearest sign that something went wrong, but by the time you hear it, the brew is usually already ruined. The better skill is reading the flow before it fails. A moka pot gives you a continuous visual signal from the first drop to the last, and learning to read it is the fastest way to diagnose problems without guessing.
What the Flow Should Look Like, Stage by Stage
Stage 1, First emergence (0-10 seconds). Coffee should appear at the central column as a slow, dark, honey-thick trickle. It looks almost like warm syrup. If the first liquid is pale, thin, and fast, the grind is too coarse or the water was too hot. If nothing emerges after 60-90 seconds on heat, the grind is too fine or the basket is overfilled.
Stage 2, Steady stream (10-40 seconds). The trickle should widen into a continuous, dark-brown stream with a visible crema-like foam on top. The stream should look smooth, not pulsing. A pulsing or stuttering stream means the bed is channeling, water is finding one path through the puck instead of moving evenly.
Stage 3, Tailing off (40-60 seconds). The stream should lighten in color and thin out, then stop on its own before the pot runs dry. The color shift from dark brown to pale tan is the signal to pull the pot off the heat. If the stream turns pale yellow and keeps running, you are past the good extraction and into the bitter, hollow tail.
Stage 4, The end. A healthy brew finishes with a soft hiss as the last water vaporizes. A loud, rattling sputter means the water is gone and steam is now pushing through the bed, the brew is done and should already be off the heat.
Reading the Failure Modes
What You See |
What It Means |
The Fix |
|---|---|---|
Pale, fast first trickle |
Grind too coarse, or water preheated too hot |
Step grind finer; use hot but not boiling water |
Nothing emerges after 90 seconds |
Grind too fine, or basket overfilled |
Step grind coarser; level the bed without tamping |
Pulsing, stuttering stream |
Channeling from uneven bed density |
Distribute grounds evenly; do not tamp |
Stream blasts out immediately |
Heat too high |
Drop the flame to low before the pot goes on |
Stream stops early, then sputters |
Bed choked; pressure built in the wrong place |
Step grind coarser; check gasket seal |
Pale yellow tail that keeps running |
Over-extraction; brew past the good window |
Pull the pot off the heat at the color shift |
Why the Visual Cue Beats the Timer
Can you make good espresso with a stovetop? The flow itself is your only real-time feedback, since a moka pot has no thermostat and no pressure gauge. Timers are unreliable because the same pot on the same burner can finish in 3 minutes or 6 depending on starting water temperature, grind, and ambient conditions. The color and texture of the stream, by contrast, tell you exactly where you are in the extraction regardless of how long it took to get there.
The Cooling Technique Most Guides Skip
If the flow is running too fast and the color is already pale, you can stop extraction immediately by wrapping the base of the pot in a cold, damp towel or setting it in a shallow bowl of cold water. This drops the pressure in the lower chamber and halts the brew before the bitter tail reaches the cup. It is the single most useful recovery move when you realize mid-brew that the heat was too high.
The reverse also works: if the flow has stalled and the pot is still on heat, a brief swirl of the pot (with a towel, never bare-handed) can redistribute the bed and restart flow without raising the flame.
Basket Density and Tamping Myths
Do not tamp moka pot coffee. This is the myth that trips up more new users than any other. Tamping is an espresso technique that relies on 9 bar of pressure to push water through a dense puck.
A moka pot has no such pressure. A tamped bed simply blocks flow.
Fill the basket loosely and level it off with your finger or the flat edge of a spoon. Leave the surface porous so water can move through evenly.
Basket density matters more than force. An uneven bed creates channels, where water finds the path of least resistance and leaves part of the coffee under-extracted.
Cleaning, Maintenance, and Replacement Parts
Clean your moka pot by hand with warm water and a soft cloth. Skip the dishwasher, which dulls finishes and degrades gaskets over time.
Rinse every part after each brew. Old residue turns rancid and shows up as a stale, harsh note in the next cup.
Replace the gasket and filter regularly. A worn gasket stops sealing, which causes leaks and sputtering. Most brewers replace theirs every few months with daily use.
The Fiamma & Ferro Linea Suprema is built from 304 stainless steel with zero aluminum contact and no plastic touching the coffee. It works on induction, gas, electric, ceramic, and halogen cooktops, and replacement gaskets are available. It also ships with a canvas storage bag and a full-color brewing guide, and orders within the mainland United States qualify for Free Shipping in Mainland United States.
For deeper guidance on equipment care, the FDA's food safety guidance on cleaning food-contact surfaces offers useful background on residue and hygiene.
Frequently Asked Questions
How do you fix bitter espresso from a moka pot?
Start by coarsening your grind to a medium-fine texture, roughly like table salt. Bitterness usually comes from over-extraction, which happens when water stays in contact with coffee too long or the grind is too fine. Use preheated water in the base so the pot spends less time on the stove, and pull it off the heat the moment you hear a sputtering sound. Freshly ground beans also help, since stale coffee tastes harsh regardless of technique.
What is the difference between moka pot coffee and true espresso?
True espresso is brewed at roughly 9 bar of pressure, producing a concentrated shot with a thick crema. A stovetop espresso maker generates around 1 to 2 bar of steam pressure, so the result is stronger and richer than drip coffee but less concentrated than machine espresso. Many people still call it stovetop espresso because the flavor profile is bold and full-bodied, even without the crema layer.
Should I grind my coffee finer or coarser for a stovetop maker?
Aim for medium-fine, somewhere between drip and espresso. If your brew sputters violently or tastes bitter and dry, go coarser. If it tastes weak and watery with a slow, dribbling flow, go finer. The Fiamma & Ferro Titanium+ Manual Grinder offers 180 grind settings, so you can dial in the exact moka pot grind size and repeat it every morning without guessing.
Does the material of the stovetop maker affect the flavor?
Yes. Aluminum moka pots can react with acidic coffee over time and may impart a metallic note if not cleaned properly. Stainless steel is non-reactive, so it preserves the coffee's natural flavor without any metallic aftertaste. The Fiamma & Ferro Linea Suprema uses 304 stainless steel with zero aluminum contact, which keeps the taste clean and consistent from the first brew to the hundredth.
A stovetop moka pot rewards patience. Dial in your grind, preheat your water, keep the heat low, and the cup will surprise you. When you want equipment engineered for that ritual, fiammaferro.com builds stainless steel moka pots with induction compatibility, zero aluminum contact, and a luxury copper PVD finish, plus precision grinders with a 10-year burr warranty. Get started with fiammaferro.com and brew a richer, cleaner cup every morning.